Key Takeaways
- The ISeC connector for Automation uses the ISeC REST API to start patch scans, wait for completion, and retrieve results.
- Installing the connector, creating a service AD account, and configuring ISeC credentials let Automation run a three-task module: Patch Scan Start, Patch Scan Wait, and Patch Scan Result to capture missing patch data for ticketing, email, or other workflows.
- Patch deployment follows the same start, wait, and report pattern, and when combined with Ivanti Identity Director, non-admin users can request scans, apply patches, and reboot systems without admin rights on target servers.
Ivanti released the new Ivanti Security Controls (ISeC) connector for Automation in the beginning of July. This makes it possible to use Automation to create advanced tasks for patching.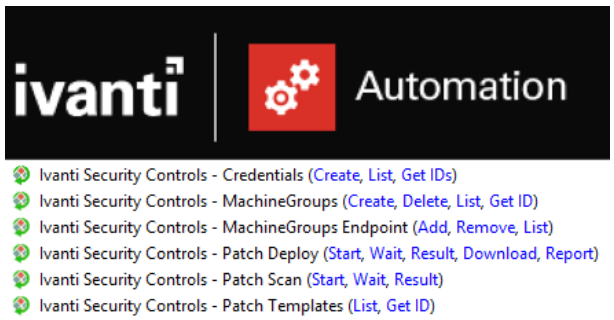
Think about patching a cluster of machines, where you first want to disconnect a machine from the cluster, patch it, reboot and test the machine and put it back into the cluster before going to the next machine. If patching goes bad, the machine should stay out of the cluster and an administrator should be notified.
Or using Identity to give the power to patch a system to application administrators, so they can scan, patch and reboot their server when they are ready without giving them administrative rights on the server. In this blog we will bring you up to speed with this new connector.
In this blog we assume you already have installed and configured Ivanti Automation and Ivanti Security Controls and that you have a basic understanding how these products work as we are not doing a step-by-step walkthrough. You first have to download the connector from the Ivanti Marketplace and install it in your Automation Environment. After this, create an Active Directory user account that Automation will be using to connect to the ISeC REST API.
Next step is setting up Ivanti Security Controls so we can successfully run tasks by leveraging the REST API. Configure the following requirements in the ISeC Console: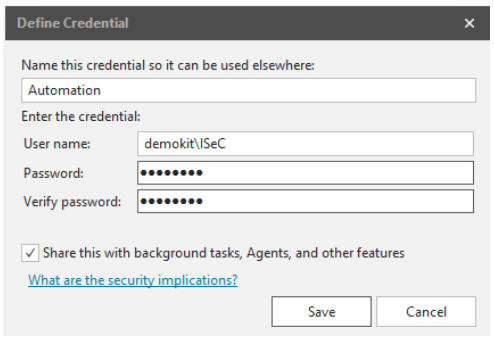
- Create a new credential for use by Automation at Tools -> Credentials. Those are needed for the REST API to start the scan and deployment and are being used to connect to the systems being patched. Notice the name, as you need it later.
- If you run the Automation tasks on another Automation agent than the one where the ISeC console is installed on, you need to run the PowerShell script that is provided at Tools -> Options -> API on the server with the Automation agent installed, so it can connect to the ISeC REST API.
- If you use User Role Assignment, you need to give the ‘create Active Directory user access’ to the ISeC console.
After setting up ISeC, we can create an Automation module to Scan a device. Open the Ivanti Automation console and create a new module. Add the task ‘Ivanti Security Controls – Patch Scan’-Start (it can be found in the Security-node). The first time you add an ISeC task it will ask you for some information to set the global variables. Use the Active Directory user account you created earlier as ISeC Serviceaccount. Set the ISeC server name (the machine with the ISeC console installed) and use port number 3121.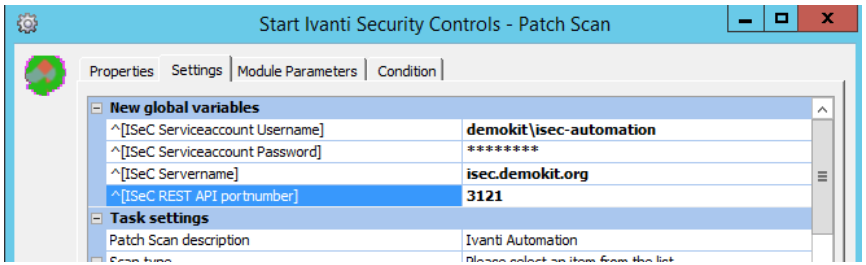
Next step is setting the Task settings. The required settings are:
- Scan Type: Set this to device
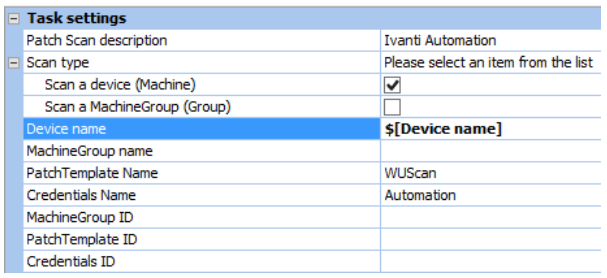
- Device name: right click in the value field and choose Insert Parameters -> AutoCreate parameter [Device name]
- PatchTemplate name: WUScan (this is a builtin template. You can use another Patch Scan Template name)
- Credentials Name: set this to the credentials created earlier.
The rest of the Task settings can be left default.
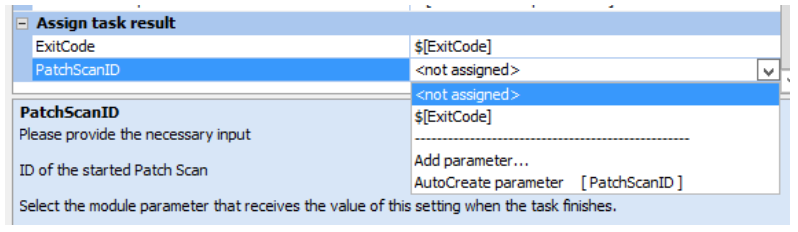
Last part is setting the result of the task into parameters.
- Exitcode is being used to return a Finished without Errors (0) or Finished with Errors (1 or higher number) back to Automation.
- PatchScanID will have the value of the internal ID for the Patch Scan given by ISeC. As it is needed in the other tasks we will add, this one is required to set. This can be done by selecting AutoCreate parameter [PatchScanID]
After this, click OK to go back to the module you are creating. The Start Patch Scan task will only start the agentless scan of a device and returns only the ID. It will not wait till the scan is ready or report anything else back. For this we need to add some other tasks.
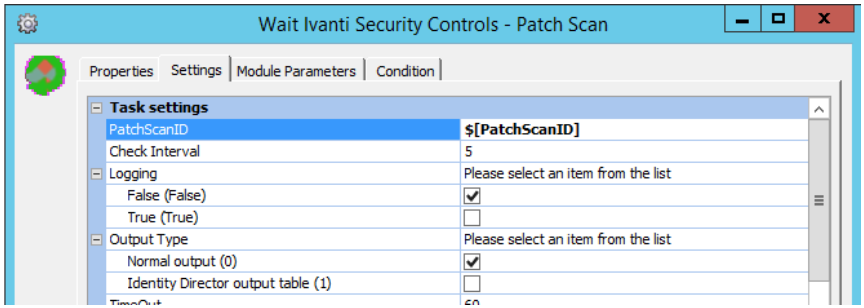
Add the ‘Ivanti Security Controls – Patch Scan’-Wait task. In the Task Settings-tab add the earlier created PatchScanID-parameter as input. You can leave the rest of the settings to their defaults. This task lets Automation wait till the scan of the device is finished before going any further. You can put the result of the task into parameters, but this is not required.
The last step is to get the results of the scan, so we know if and how many patches are missing on the machine. Add the task ‘Ivanti Security Controls – Patch Scan’-Result to the module. Insert the PatchScanID-parameter to the task settings. The rest can be left to the default settings. Set the task result ‘ResultPatchScan’ to a new parameter by using the AutoCreate parameter function.
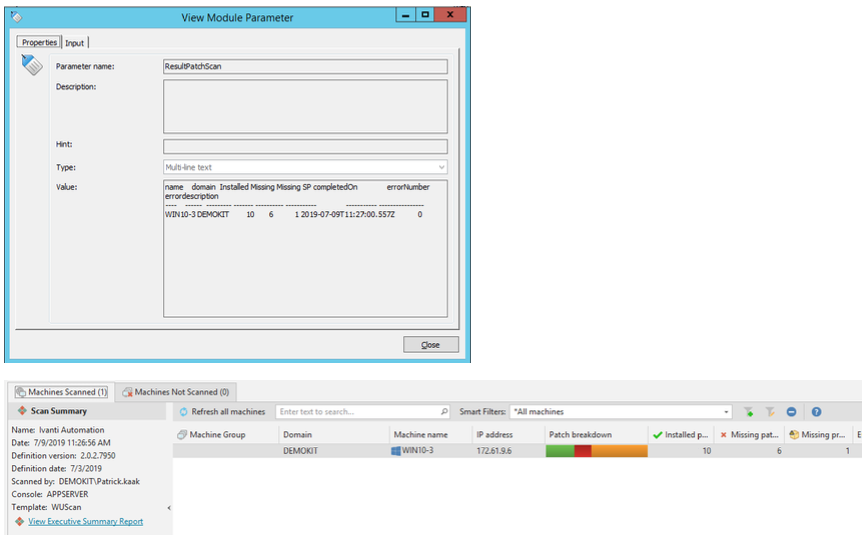
You have now created a module with 3 tasks in it, that will scan a device and put the report about missing patches in a parameter. Right click on the module to schedule it. Select the machine with the Automation agent that will communicate with the ISeC API and in the Job Parameters set the name of the device you want to scan. Hit the OK-button to run the tasks in the module.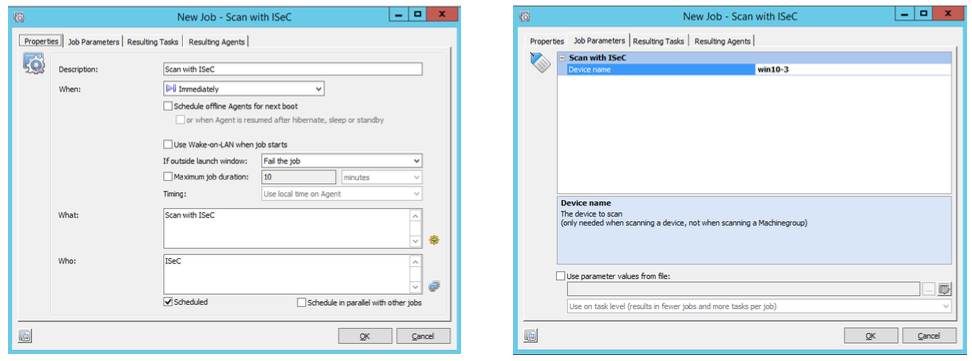 After the module has run, you can find the results in the module parameter that you created to capture the results in. To extend the module, you could parse the results into a task that creates a ticket in your ITSM solution or mail the results to a person. You can also find the results in the ISeC console. It will show the name that you can set in the Patch Scan – Start task settings (default set to Ivanti Automation) with the results.
Deployment of Patches
After a scan, you probably want to deploy the missing patches. This works the same way as the Patch Scan tasks. The deploy task is broken into several smaller tasks (start, wait, report). The ‘Ivanti Security Controls – Patch Deploy’-Download task can pre-download the patches in the cache of the server, distribution server and clients. The Deploy-Start task starts the deployment. As input it needs the PatchScanID that you also used in the earlier tasks. Other required task settings are the Deployment Template Name and the Credentials Name. This will result in a PatchDeployID that can be used for the -Wait command to wait till the task is finished (keep in mind that when missing a lot of patches, you might have to set a higher Deploy time-out for this task). The -Results task will show a summary of the deployment while the Report function results in a detailed report as output.

When combining Ivanti Security Controls with Ivanti Identity Director, it is possible for non-administratorsand users without access to the ISeC console to scan their systems upon request. They can scan, deploy and reboot the system when they are ready. See the video above for an example how this can work.