The AppSense Support Portal
*This post originally appeared on the AppSense blog prior to the rebrand in January 2017, when AppSense, LANDESK, Shavlik, Wavelink, and HEAT Software merged under the new name Ivanti.
You may have noticed a couple of months ago that myAppSense.com and a couple of our other web sites were decommissioned and consolidated into the new AppSense Support Portal. In this blog I am going to discuss some of the reasons behind the decision to do this as well as detail some of the common features of the Support Portal.
The Support Portal is available as a link from the main www.appsense.com web site and by navigating to support.appsense.com or www.appsense.com/support. If you had an active myAppSense account, then you should have already received an email informing how to set your password.
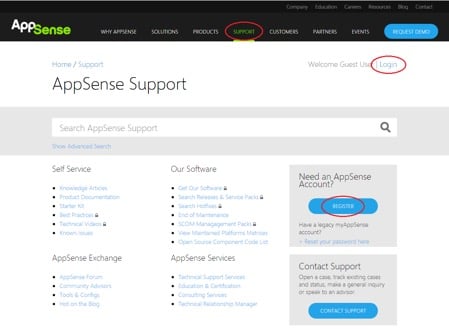
Once you have navigated to the portal you have the option to browse the content which has been made available to guest users, register for the portal, or if you already have an account, Login.
One of the main drivers behind the launch of the new Support Portal is to try and make our internal knowledge and collateral available and accessible to those of you who are using our software. Our aim is to make it easier for you to find solutions to the problems and configuration issues which you run into. There are a number of ways that we are doing this.
Firstly we have made a lot of our knowledge and resources available to Anonymous users. This means that a large proportion of content, including the product documentation, is available without even needing to have a login to the portal.
In addition we have consolidated all of our knowledge and resources into a single location, for example the ‘Tools & Configs’, which were previously available via the AppSense-Exchange web site are now available from the Support Portal. You will also notice that a large amount of content which was never available before has now been published via the Support Portal. An example of this is the Technical Videos which include short and concise presentations describing and giving examples of how new features in a release can be configured.
From the main page you will notice the search box, this can be used to search all content which is available to you. Within the main body you will see the headings ‘Self Service’, ‘Our Software’, ‘AppSense Exchange’ and ‘AppSense Services’ which provide links to our content.
Clicking on one of the links, such as ‘Knowledge Articles’ will provide search results in filtered list containing the type of article that was clicked.
From within this main search page, there are three main ways which you can search for content. Firstly there is a free text search box to perform a general search. Below this there is a “Show Advanced Search” option to assist in constructing more complex search strings.
Across the top of the search results it is possible to filter based on taxonomy. This allows you to drill down to specific articles based on product, element and feature. Finally on the left hand side it is possible to filter by attributes such as article type, product and version numbers.
You can search for articles using 1, 2 or all 3 of these methods.
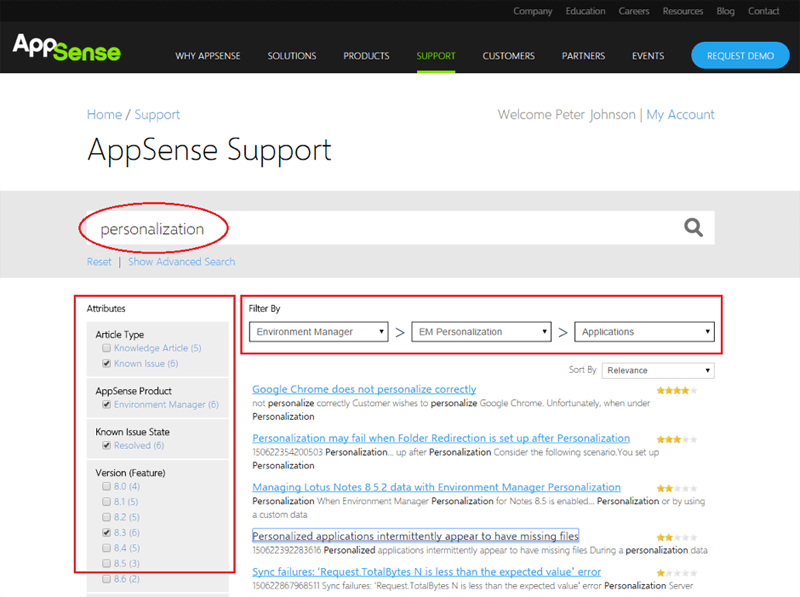
In the example above I have searched for ‘personalization’, which is quite a common term for us! I have then used the taxonomy to drill down to articles relating to Environment Manager -> EM Personalization -> Applications. Finally I have used the attributes to filter down to articles relating to Known Issues which affect Environment Manager 8.3, but have now been Resolved in a later release.
This has returned 6 articles order by relevance (Star Rating) based on the search criteria.
When clicking on a solution it will open within a modal window.
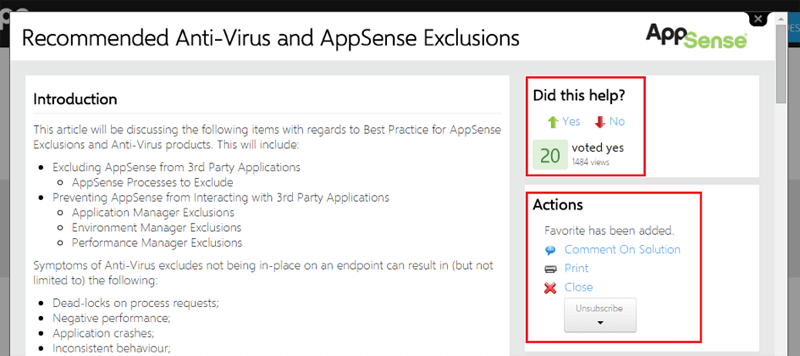
Once you have read the article there are a number of options available to you. It is possible to provide quick feedback on whether this article was helpful. In addition it is possible to add comments to the article providing further information which may be helpful to other people or asking questions if anything in the article is unclear. It is also possible to subscribe to the article so that you are notified of any updates to it.
Finally, when closing the modal window again, logged on users with a support contract have the option in the top right hand corner to manage their account.
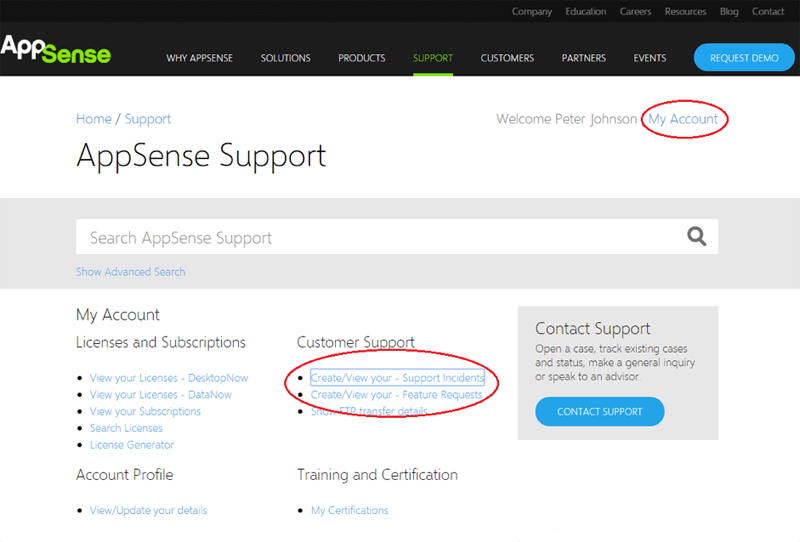
From within this section of the Portal you have the ability to create and manage your Feature Requests and Support Incidents. You will notice that it is possible to view and manage incidents raised by colleagues, as well as those which are raised by yourself. In addition it is possible to view all the licenses and subscriptions associated with your account.
Thanks for taking the time to read this blog, I hope that it has given you a little insight into our vision here at AppSense Support. We don’t see the Support Portal as a finished product, but a constantly evolving and improving interface. As such we welcome all feedback and will use this to inform our decisions as we decide what direction the Support Portal should take in the future.